🚀 GET STARTED WITH ARDUINO CODING
Click on your device image below to jump directly to the step-by-step guide for that specific board and start coding! Ready to bring your projects to life right now?
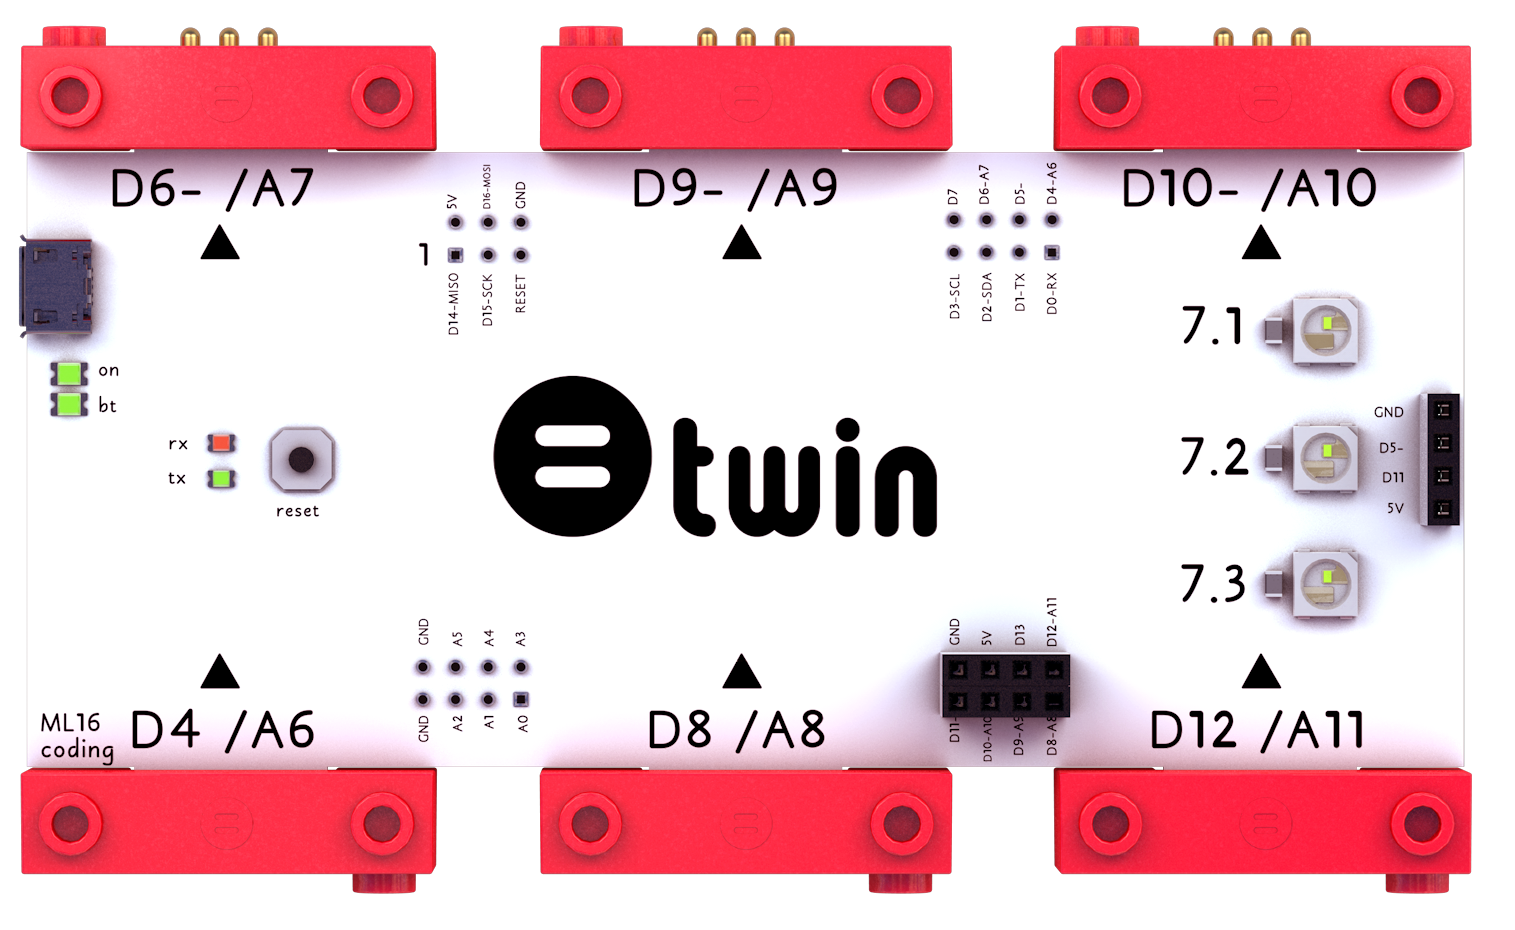

🎯 TWIN CODING MODULE GUIDE
Learn to code your Twin Coding Module with Arduino IDE. This Leonardo-based module lets you start your projects immediately!
📥 Download Arduino Application
Click this link to download Arduino IDE compatible with your operating system and install it on your computer.
⚙️ Installation and Board Settings
Open Arduino IDE and from the menu select Tools → Board and choose “Arduino Leonardo”.
🔌 Connect Your Board
Connect your Twin Coding Module to your computer using a USB cable. Then go to Tools → Port menu and select the correct port for your board.
🎉 Run Your Code!
Your Twin Coding Module is now ready for coding! Write your desired code and click the “Upload” button in the top-left to start using it.
🔄 RETURNING TO TWIN CODING APPLICATIONS
After coding with Arduino IDE, to use the Twin Coding mobile app or Twin Code Lab website again, you need to reload the Twin libraries to your module.
📦 Download Twin Library
📁 Add Library to Folder
Copy and paste the downloaded TwinArduinoFirmware file to Documents → Arduino → libraries folder on your computer.
⬆️ Upload Library to Module
Restart Arduino IDE, open the Framework folder, open the "TwinArduinoFirmware.ino" file inside and click the “Upload” button to upload it to your module.
🚗 Bonus: Line Follower Car Sample Code
Download ready sample code to develop your Line-Follower project with Arduino IDE:
📡 ESP32 DEVELOPMENT BOARDS GUIDE
ESP32 boards are powerful microprocessors with Wi-Fi and Bluetooth capabilities. Extra board manager installation is required. Please follow all steps carefully.
🔗 Adding ESP32 Board Support
In Arduino IDE, go to File → Preferences and paste the following link in the “Additional Board Manager URLs” field:
https://raw.githubusercontent.com/espressif/arduino-esp32/gh-pages/package_esp32_index.json
📦 Installing ESP32 Package
Open Tools → Board → Board Manager... menu. Type “esp32” in the search box and install the ESP32 by Espressif Systems package by clicking Install.
🎯 Board Selection and First Test
From Tools → Board menu select “ESP32 Dev Module” (or suitable for your model) and from Tools → Port menu select the correct port.
Try the following LED blink code for your first test:
// ESP32 Built-in LED Test Code
// Built-in LED is usually on GPIO pin 2

const int ledPin = 2;

void setup() {
  // Start serial communication
  Serial.begin(115200);
  Serial.println("ESP32 LED Test Starting...");

  // Set LED pin as output
  pinMode(ledPin, OUTPUT);
}

void loop() {
  digitalWrite(ledPin, HIGH);   // Turn LED on
  Serial.println("LED ON");
  delay(1000);                  // Wait 1 second

  digitalWrite(ledPin, LOW);    // Turn LED off
  Serial.println("LED OFF");
  delay(1000);                  // Wait 1 second
}
💡 Tip: After uploading the code, open Tools → Serial Monitor to see the messages!
⚠️ Important Notes
Some pins in ESP32 are special-purpose, so not all pins can be used. Don’t forget to check the pin diagram when working on projects!